
Tutorial: Use LaTeX Locally with VS Code
Published:
This post is a quick guide to setting up LaTeX on your own computer, so you can write papers, resumes, or dazzling “class notes” using LaTeX locally—without relying on internet connectivity. In other words, you won’t be tied to Overleaf: you can bring your laptop anywhere and keep working on your next big ideas.
Why not Overleaf?
First off, let me say that Overleaf is awesome! It’s a rather complete product, crafted for all the heavy LaTeX writers, with many desirable features, a huge library of templates, and a great collection of LaTeX guides.
Generated by GPT-4o. Prompt: A playful illustration showing a person sitting on an airplane, trying to work on a laptop with the Overleaf logo on the screen, but looking frustrated because there’s no Wi-Fi signal. Outside the window, fluffy clouds and a blue sky. In the background, a thought bubble shows the same person happily working on their laptop (with VS Code logo) in a cozy home office, surrounded by books and coffee, with a checkmark and a glowing PDF icon. The style is colorful, lighthearted, and cartoonish.
However, relying solely on a cloud-based service like Overleaf comes with a few drawbacks:
1. Server downtime
Just like when your favorite social media or streaming site occasionally refuses to load, Overleaf is subject to outages. See Overleaf’s status page for yourself.
One of my MIT LGO alumni friends mentioned that a few years ago, while writing their MIT thesis, an Overleaf outage definitely made for some uneasy times.
At the time of writing this blog, the most recent “blockbuster” incident was Overleaf being down on May 14, just before the NeurIPS manuscript deadline. You can see how people reacted under Overleaf’s X post about this outage.
2. Difficult to write without internet (e.g., onboard a flight)
Ideas come and go. Who doesn’t like the idea of being able to jot them down and immediately see the LaTeX render? Many people seem to be more productive in the air, but are we going to pay for that in-flight Wi-Fi (assuming Wi-Fi is even available onboard)?
This is where a local setup shines. While Overleaf is truly a crucial product in academia and beyond (and I still like it!), I also want to be immune to these risks. Here’s how you can de-risk by having a local setup.
Disclaimer: I am a heavy macOS user, so for the rest of this guide, I’ll do my best to mention what might be different on Windows. (If you use Unix, this guide may already not be needed for you!)
TL;DR
My local setup is: VS Code + the “LaTeX Workshop” extension for VS Code + TeX Live.
This blog is aggressively simplified from the much more thorough installation guide of the LaTeX Workshop extension. I envisioned this blog to be very lightweight and introductory (i.e., not loaded with info that would please “power users”), but I’ll iterate and try to find the right balance between too basic and too hardcore. Your feedback is greatly appreciated!
1. Install TeX Live
TeX Live is a LaTeX distribution compatible with and recommended by the LaTeX Workshop extension.
- macOS: https://www.tug.org/mactex/mactex-download.html
- Windows: https://www.tug.org/texlive/windows.html#install
2. Install VS Code
Download it here: https://code.visualstudio.com/download
3. Install the LaTeX Workshop Extension for VS Code
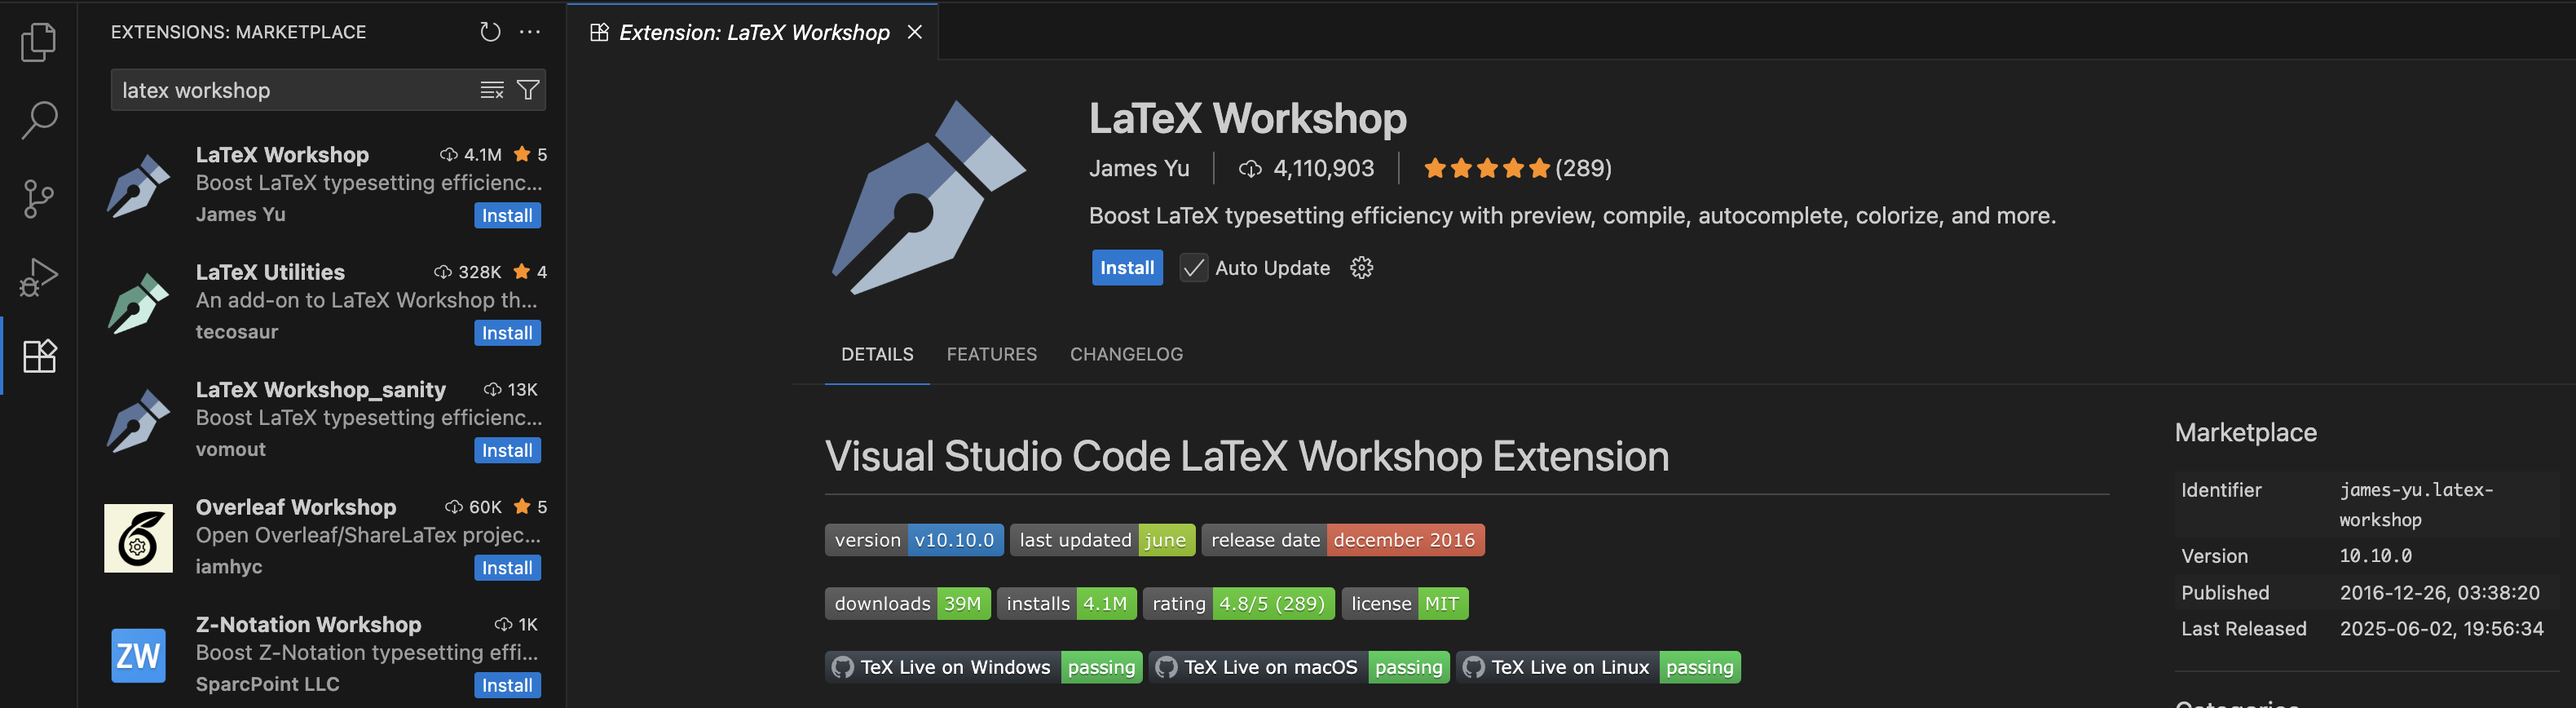
Open VS Code and look up the “LaTeX Workshop” extension in the Extension Marketplace:
- Bring up the Extensions view by clicking on the Extensions icon in the Activity Bar on the side of VS Code.
- In the search bar, type “LaTeX Workshop” and look for the one authored by James Yu.
- Click “Install”.
4. Test: Your first locally built PDF
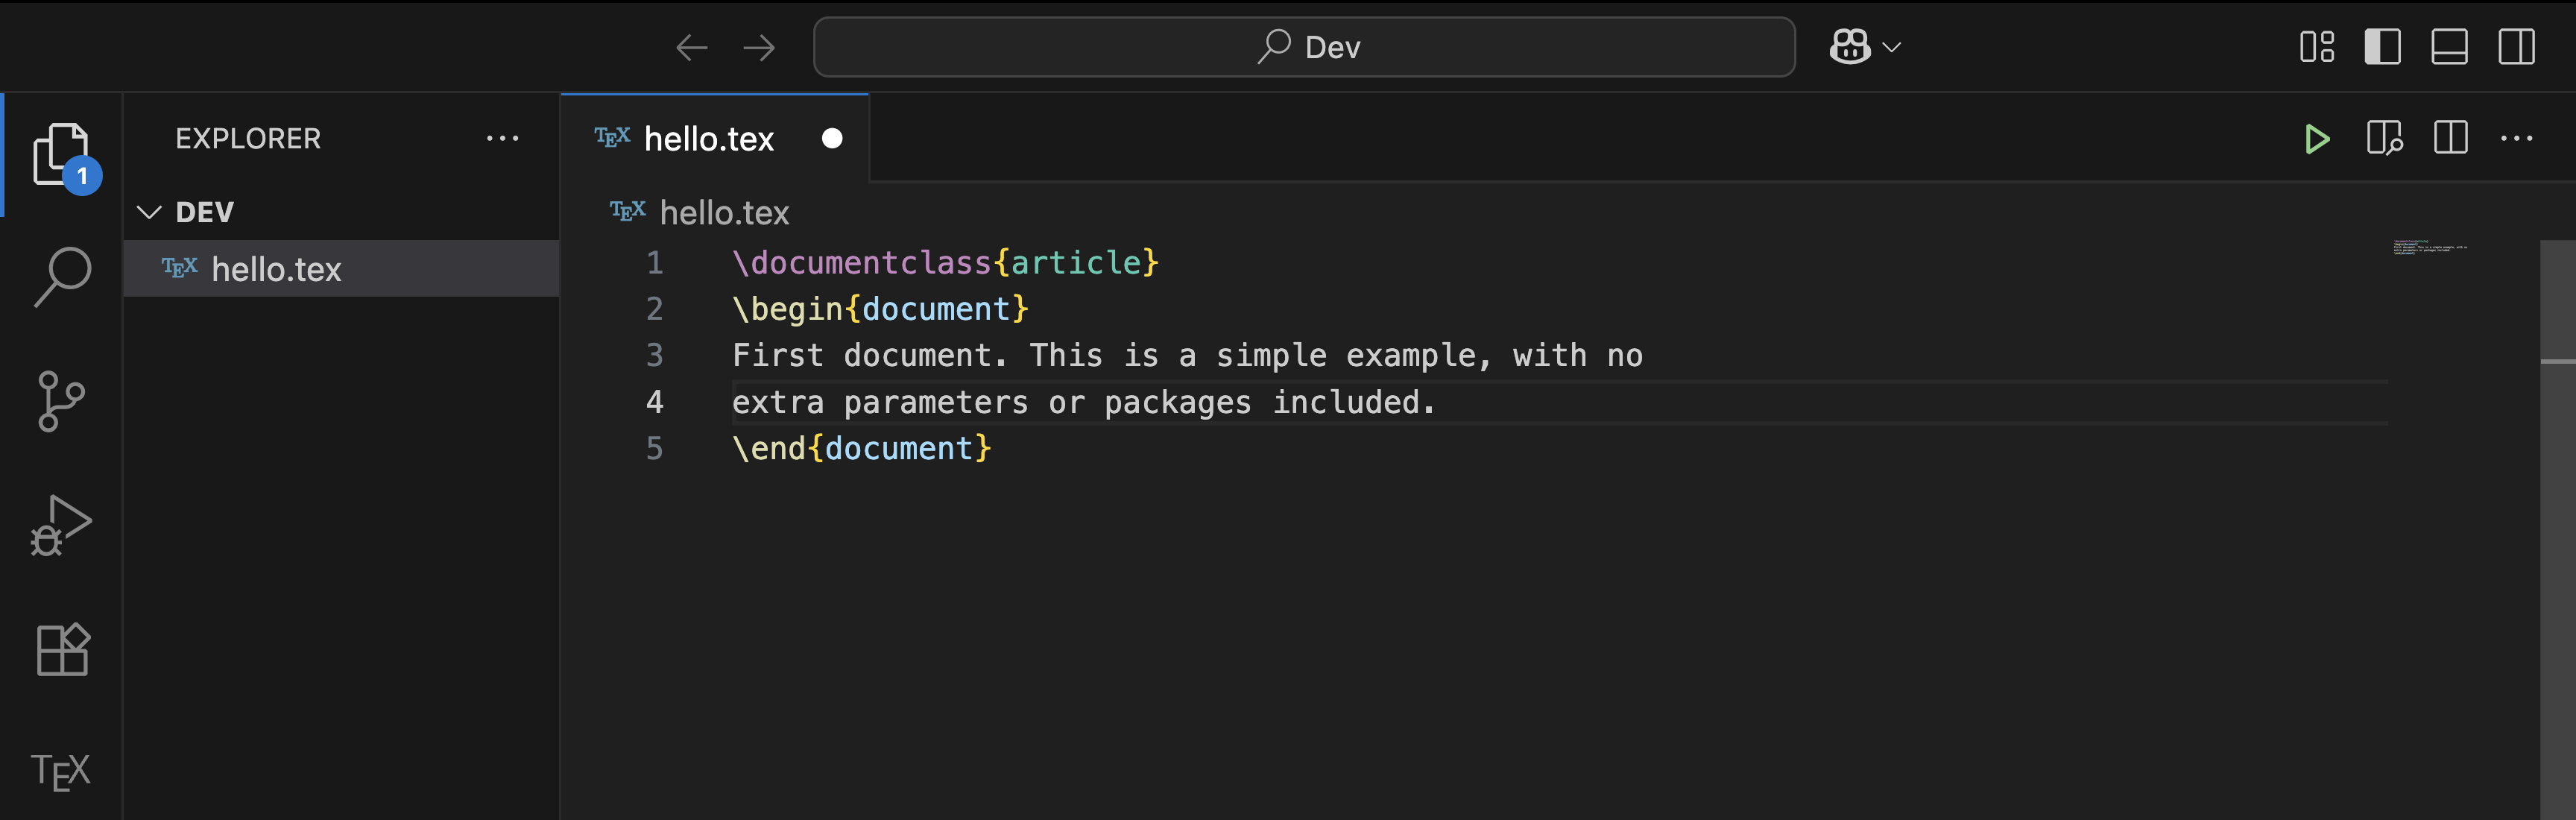
Let’s try it out! In VS Code, create a new file. I named mine hello.tex and typed in the following content (source: Overleaf guide—see, I told you Overleaf is awesome):
\documentclass{article}
\begin{document}
First document. This is a simple example, with no
extra parameters or packages included.
\end{document}
Now, save your file in VS Code:
- macOS:
command+S - Windows:
Ctrl+S
By default, the LaTeX Workshop extension has a convenient feature turned on: whenever you save or even change the .tex file, compilation of your LaTeX project is triggered. If nothing seems to happen, try clicking the green triangle icon at the top right corner.
Like anything in the developer world, the LaTeX Workshop extension comes with many customization options. For example, the auto build trigger is available in the extension’s settings. 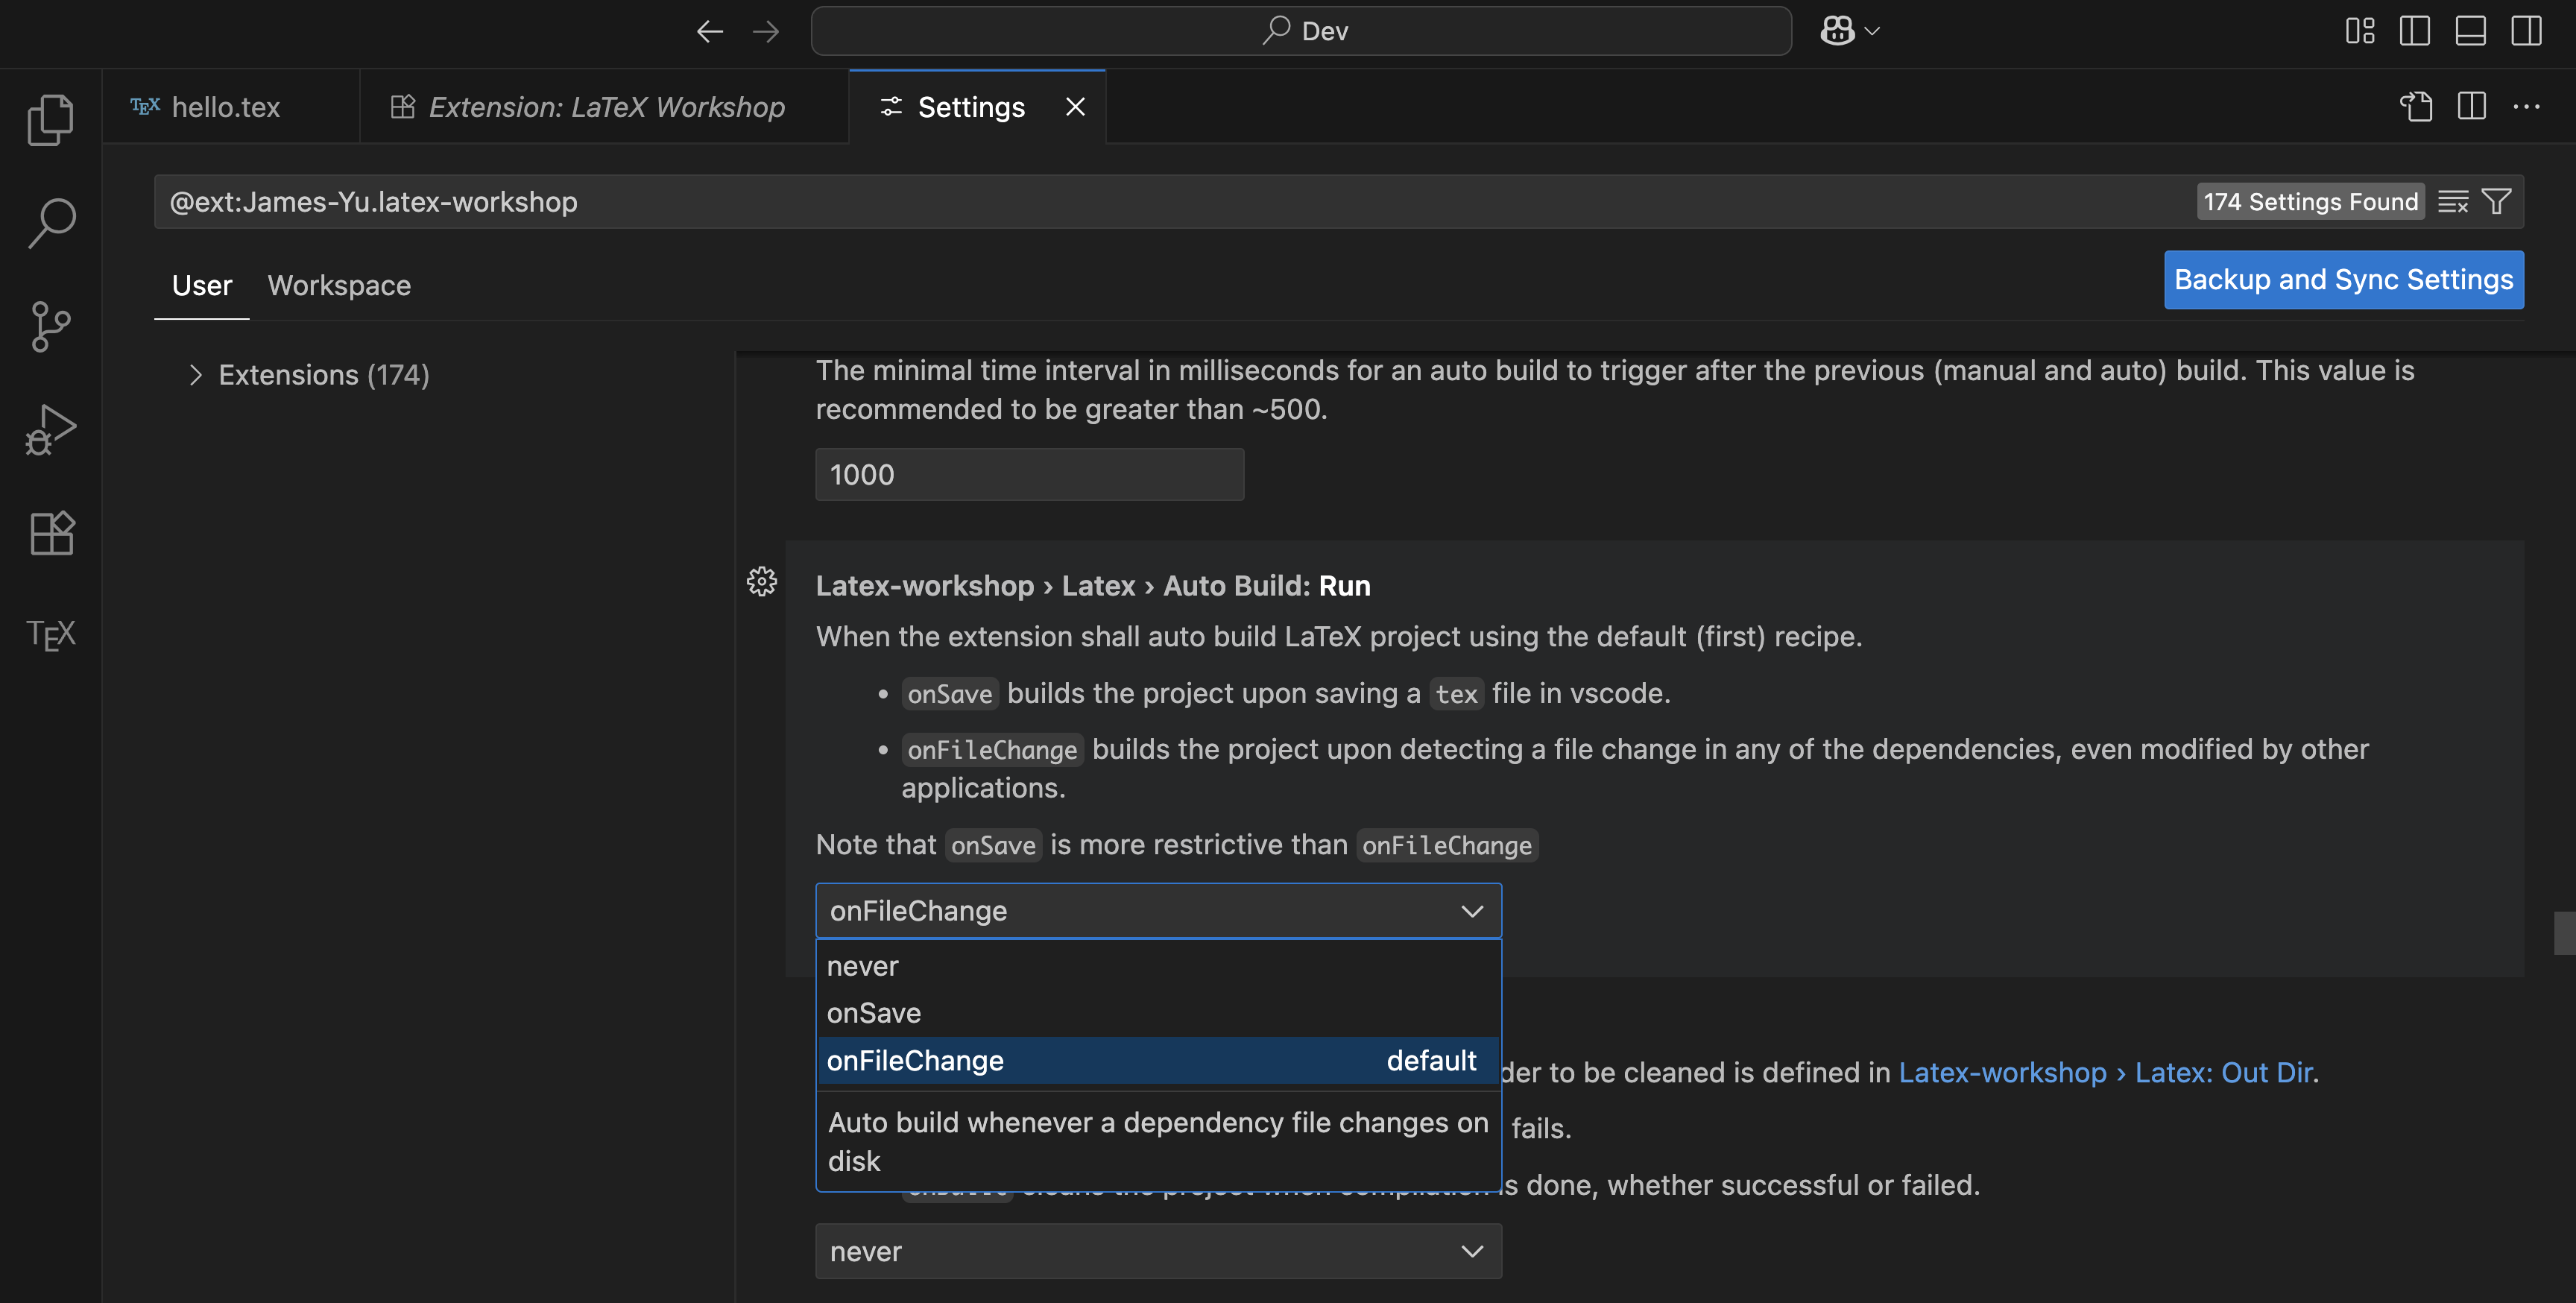 For simplicity, I won’t go into detail here.
You should now see something similar to the following screenshot:
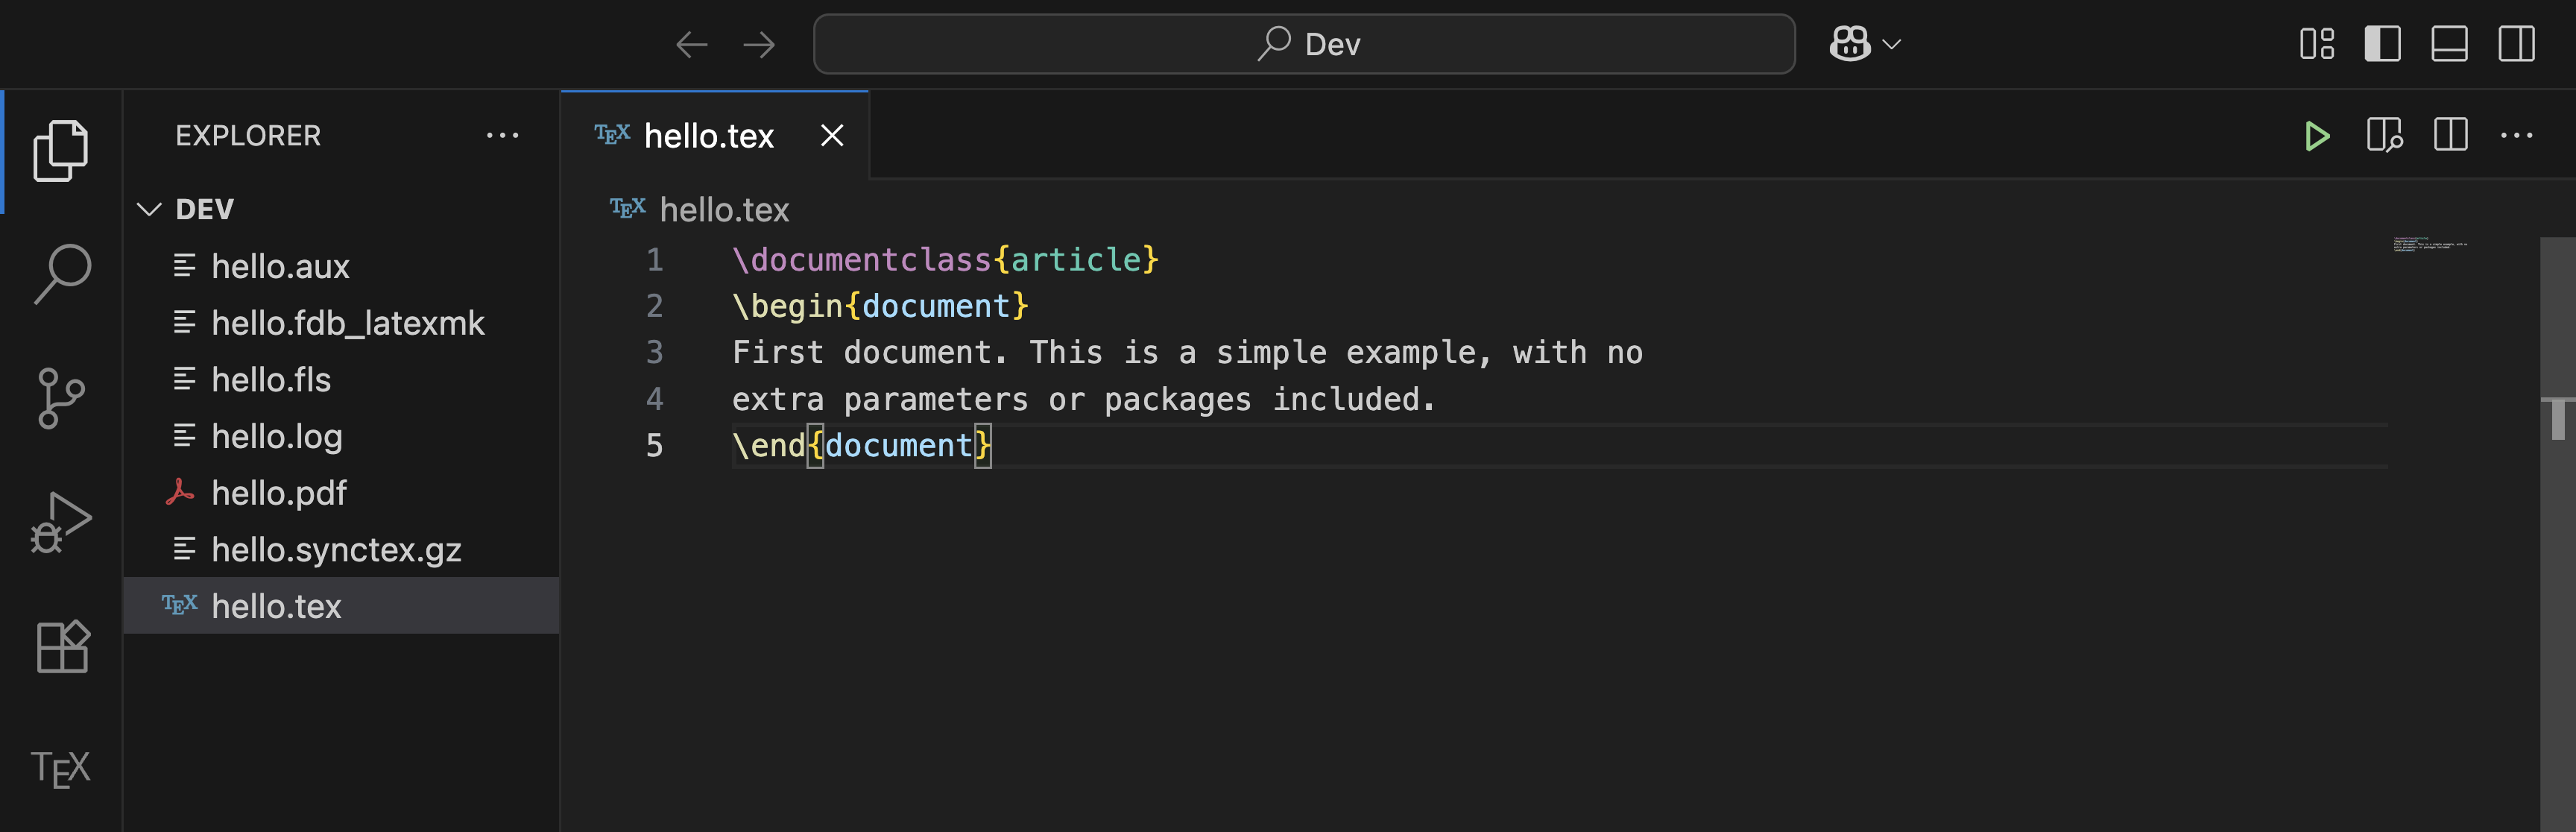
In the same folder as your hello.tex, you’ll see:
- a
hello.pdf(what we really care about), and - a bunch of auxiliary files; ignore them for now (again, I won’t go into detail here).
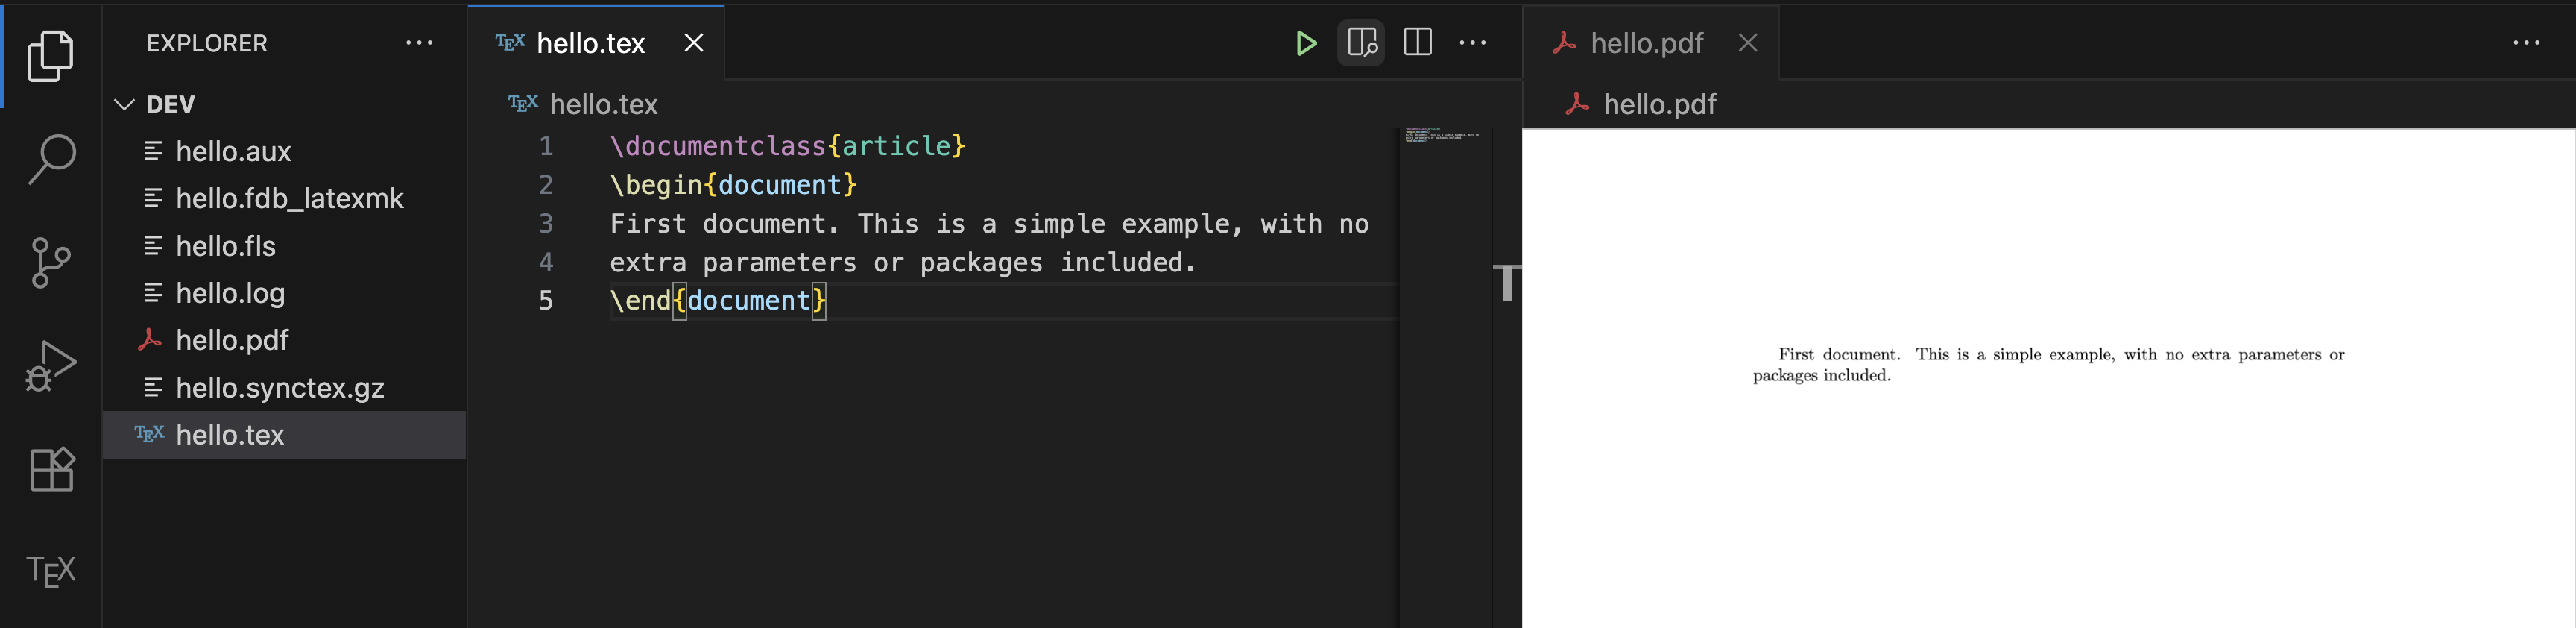
You can click on hello.pdf and expect to see exactly what our simple .tex file should render into.
A very convenient feature is to show the PDF file side-by-side with your .tex file. Find the green triangle Build button at the top right corner; right next to it is another icon with a little magnifier over two rectangles—click it.
Congratulations! You now have a “barebones” setup for working on LaTeX documents locally. Convince yourself by disconnecting your computer from the internet, making some random edits to your .tex file, and saving your changes again.
Troubleshooting
I initially came across LaTeX fatal error on PID undefined. Error: spawn latexmk ENOENT. My solution was simply to restart VS Code.
Please let me know if you encounter any other issues!
Coming soon…
I plan to write a mini-series of blogs on LaTeX, specifically in the context of writing a thesis at MIT. In the future, I plan to cover:
- How to use
gitto track your progress and back up with GitHub - How to use the MIT thesis template with this local setup
Meanwhile, please let me know if you have any suggestions for this tutorial or future topics.